¶ 🧭 Welcome to Our Wiki.js Portal
This page is your quick onboarding guide to using our Wiki.js instance effectively — including how to
- log in
- create and edit content
- upload screenshots
- work with diagrams
- view page history
¶ Table of Contents
- 📖 Overview
- 🎯 Quick Tour
- 🔐 How to Log In
- 🧑💻 Creating and Editing Pages
- 📊 Adding Diagrams
- 🖼️ Uploading Screenshots and Pictures
- 🎥 Inserting Videos
- 🕓 Viewing Page History
- 🚀 Summary
¶ 📖 Overview
Wiki.js is a powerful and modern wiki engine running on Node.js, designed to be user-friendly, customizable, and ideal for both public and private knowledge bases. Whether you're here to explore or contribute, this guide will help you get started quickly and efficiently. You can log in, create pages, embed diagrams, upload screenshots, and track every change — all through a clean and intuitive interface.
¶ 🎯 Quick Tour
- 🔐 Log In: Use Microsoft Login Provider after clicking on top right hand corner user icon
- 🧭 Navigation: Use the left sidebar to browse through content categories.
- 🛠️ Admin Area (if you have access): Configure settings, manage users, and customize the interface.
- 🔍 Search: Use the top search bar to find anything instantly.
- 🧩 Modules: Check out available integrations under Administration > Modules.
- 🖼️ Uploading Screenshots: You can easily drag and drop images into any page while editing — perfect for visual documentation. A video guide shows this in action.
- 📚 Revision History: Every page edit is tracked. Use the history tab to compare, review, or restore older versions of a page.
¶ 🔐 How to Log In
To start editing and contributing:
- Click the "Log in" button in the upper-right corner.
Click to view screenshot of Login Button

Click to view screenshot of Microsoft login option

¶ 🧑💻 Creating and Editing Pages
Once logged in, you can create and manage content with ease:
- Go to the “Content” area from the left sidebar.
- Click “New Page”.
- Choose a parent location (e.g.,
Documentation/,Guides/, etc.). - Set a title and hit “Create”.
- Use the Markdown editor to write content, or switch to Visual mode for a more WYSIWYG-like experience.
To edit a page:
- Navigate to the page you want to edit.
- Click the pencil icon ✏️ in the top bar.
- After editing, press “Save” or “Commit”.
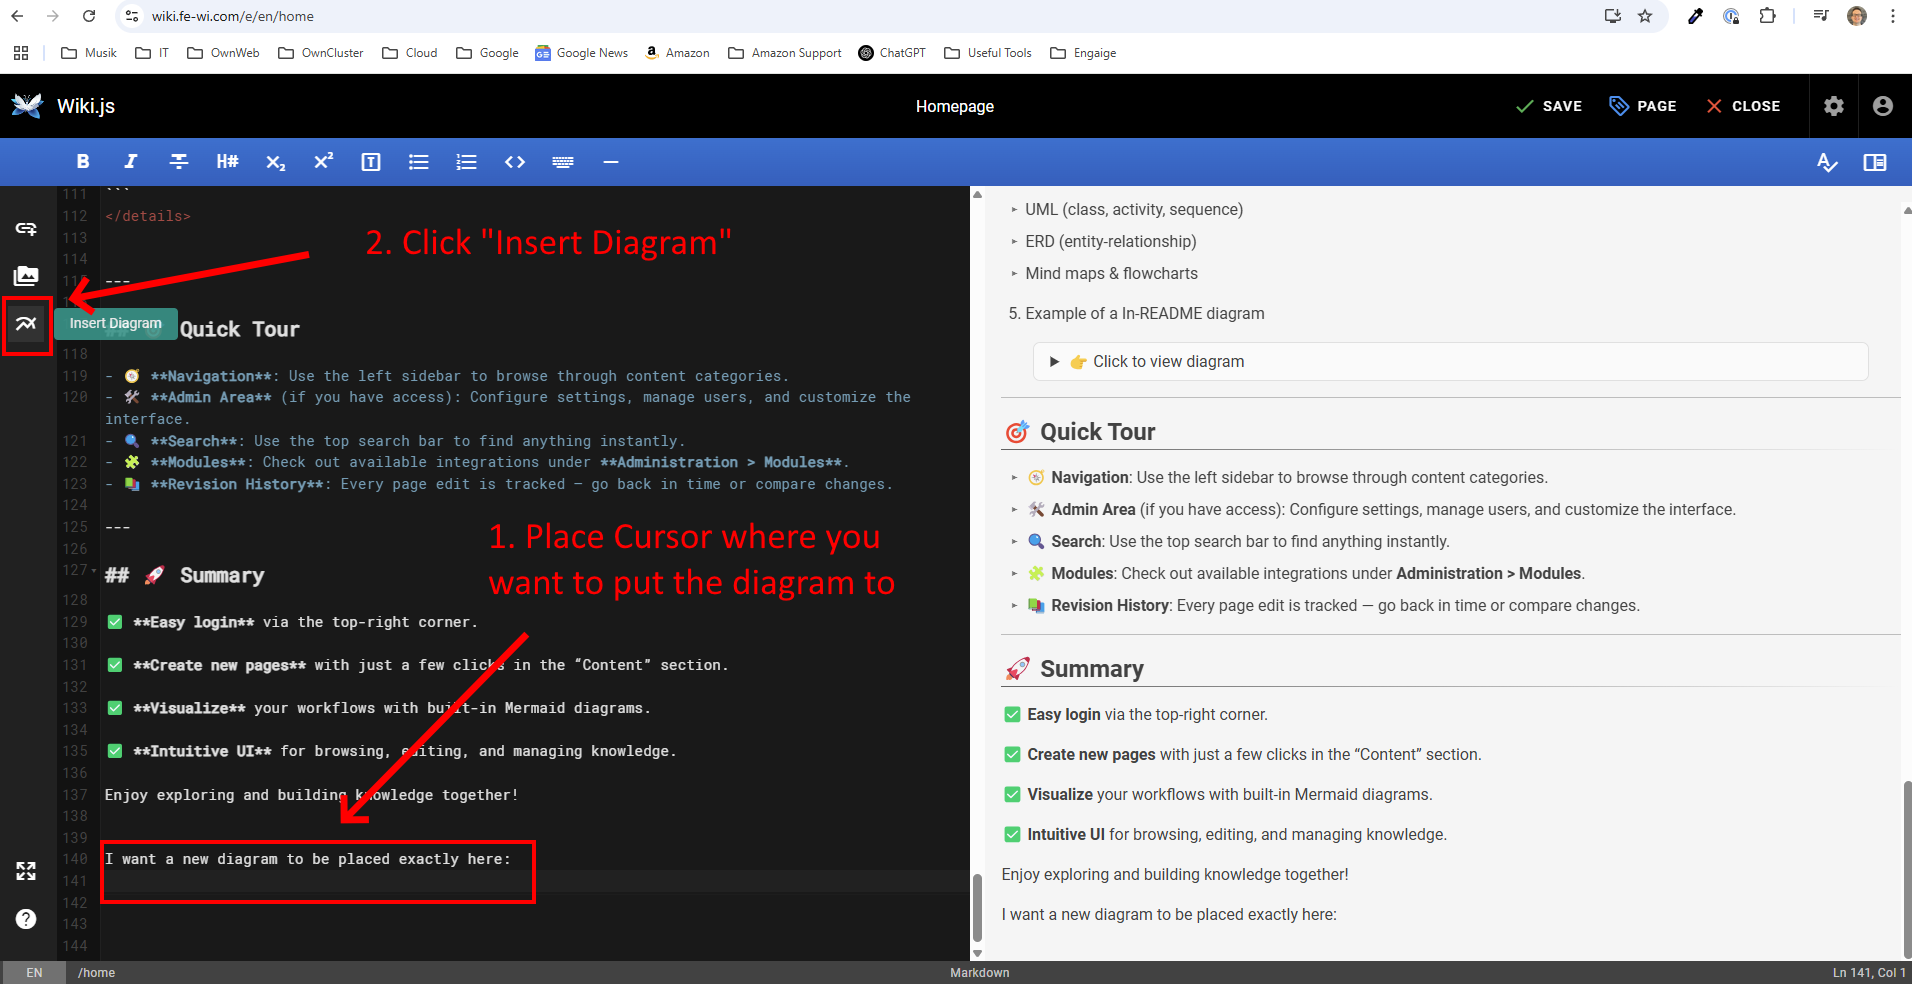
¶ 📊 Adding Diagrams (draw.io)
For more advanced drag-and-drop diagrams:
- In the page editor, place your cursor and insert a new Diagram.
Click to view screenshot of how to add a new diagram
- The built-in draw.io editor will launch (as shown below).
- Drag shapes from the left, connect elements, and use the right pane for styling.
Click to view screenshot of the diagram editor
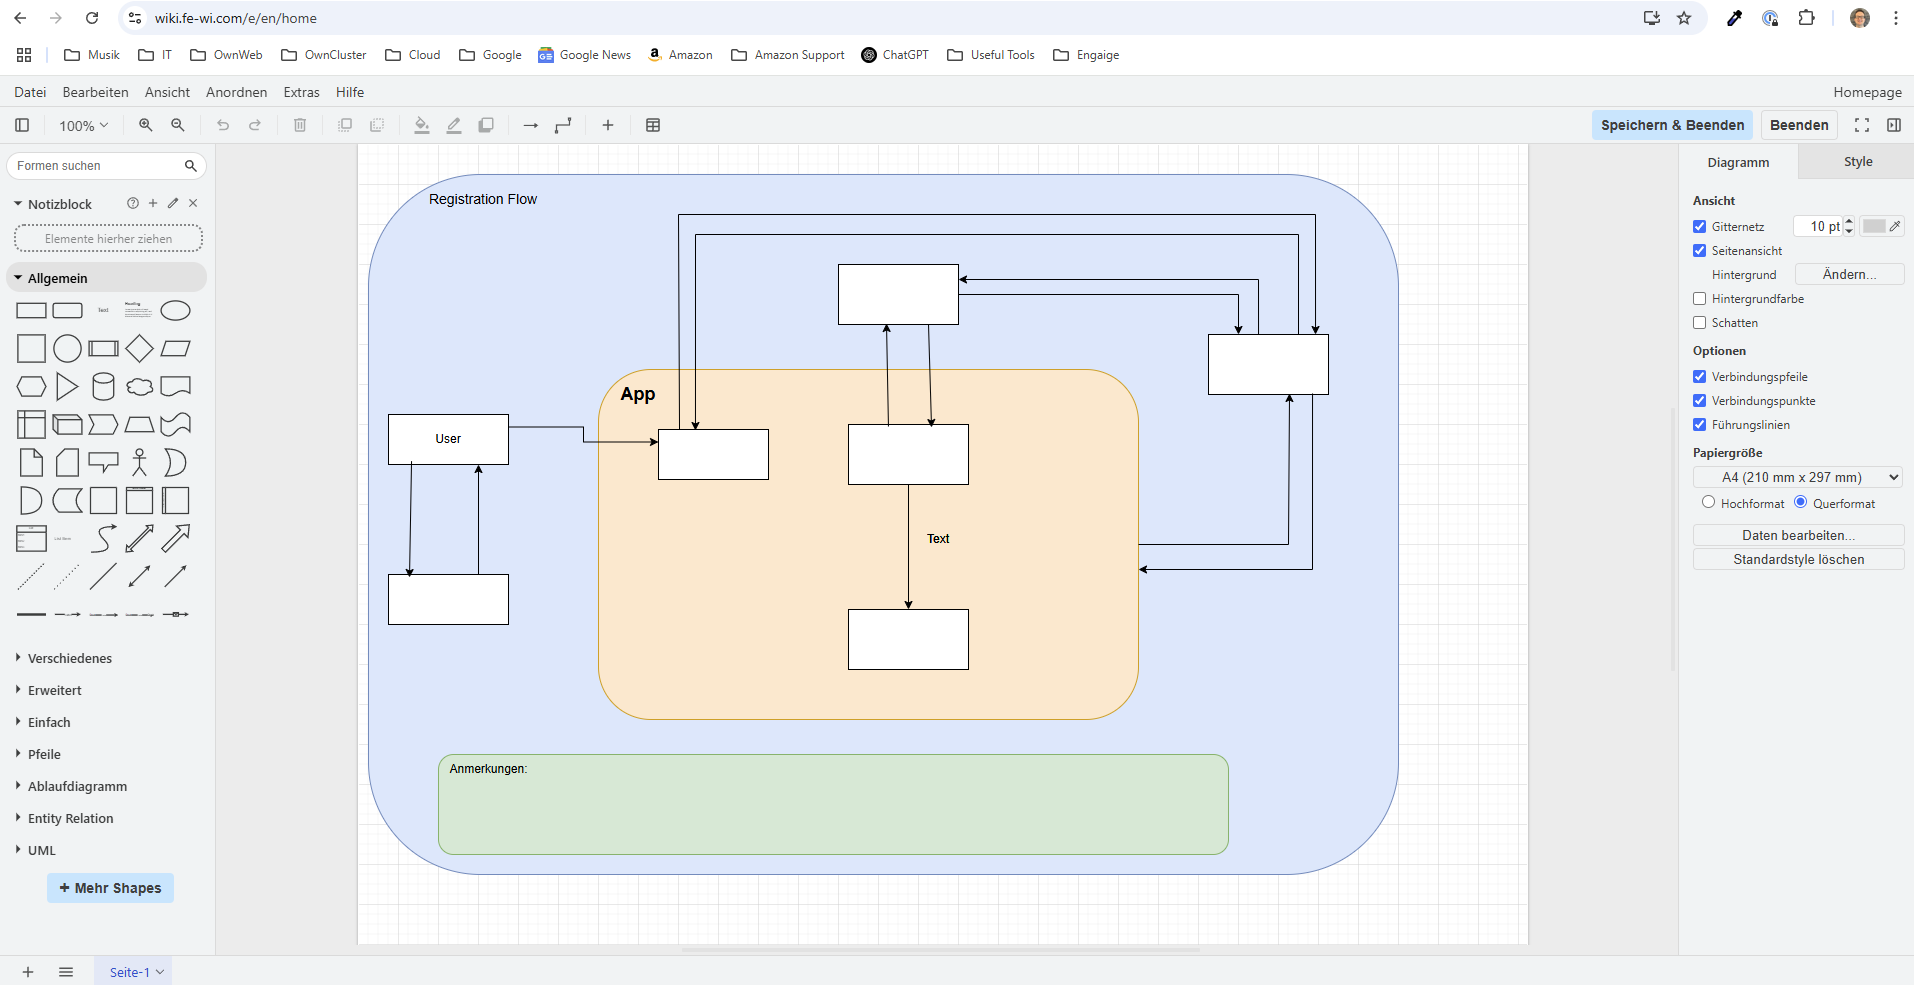
- Click “Speichern & Beenden” to embed the diagram into your page.
Draw.io is great for:
- IT architecture diagrams
- UML (class, activity, sequence)
- ERD (entity-relationship)
- Mind maps & flowcharts
- Example of a In-README diagram
Click to view expandable diagram
¶ 🖼️ Uploading Screenshots and Pictures
Adding visuals to your documentation helps convey information more effectively. This Loom video explains exactly how to upload screenshots or other pictures into Wiki.js using the visual editor:
¶ In short, you'll learn:
- How to open the image upload interface
- How to insert screenshots directly into any page
The process is simple and fast — no technical knowledge required!
¶ 🎥 Inserting Videos
You can embed videos directly into your Wiki.js pages to provide tutorials, demos, or visual context.
¶ ⚠️ Upload Limit Notice
Wiki.js has a default file upload limit of 5 MB. If your video is larger, you'll need to compress it before uploading.
¶ 🔧 Compressing Videos with FFmpeg
Use the following command to reduce resolution and frame rate while compressing
ffmpeg -i input.mp4 -vf "scale=1280:720,fps=24" -vcodec libx264 -crf 28 -preset slow -acodec aac -b:a 128k output.mp4
ℹ️ Click here to learn what the FFmpeg command does and how to install it
¶ 🧠 What does the FFmpeg command do?
ffmpeg -i input.mp4 -vf "scale=1280:720,fps=24" -vcodec libx264 -crf 28 -preset slow -acodec aac -b:a 128k output.mp4
-i input.mp4: Specifies the input video file.-vf "scale=1280:720,fps=24":scale=1280:720: Downscales the video to 720p resolution.fps=24: Sets the frame rate to 24 frames per second (standard for film).
-vcodec libx264: Encodes the video using the efficient H.264 codec.-crf 28: Sets the quality/compression level. Lower means better quality and bigger size. 28 is a good balance.-preset slow: Optimizes file size. Slower = smaller file, but longer processing time.-acodec aac: Uses the AAC codec for audio (standard for mp4).-b:a 128k: Sets audio bitrate to 128 kbps (reasonable for spoken voice or tutorials).output.mp4: Specifies the output file name.
¶ 💻 How to Install FFmpeg
¶ 🪟 Windows (using winget or manual method)
Option 1 – Winget (easiest)
winget install ffmpeg
Option 2 – Manual
- Download from: https://www.gyan.dev/ffmpeg/builds/
- Extract to
C:\ffmpeg - Add
C:\ffmpeg\binto your system PATH via System Properties > Environment Variables.
¶ 🍎 macOS
If you have Homebrew installed:
brew install ffmpeg
Or download from: https://evermeet.cx/ffmpeg/
¶ 📼 Video Tutorial
This video demonstrates how to upload and embed videos in Wiki.js pages:
💡 Tip: After uploading the video, use a
<video>HTML tag like below to embed it inline:
<video width="640" controls>
  <source src="//home/wikijs-video-tut.mp4" type="video/mp4">
  Your browser does not support the video tag.
</video>
¶ 🕓 Viewing Page History
Want to see what changed on a page or go back to an older version? This short Loom video shows how to use the Wiki.js history feature to review or revert changes.
¶ You'll learn how to:
- Access the full revision history of any page
- Compare two versions side-by-side
- Restore a previous version if needed
Ideal for team collaboration and accountability.
¶ 🚀 Summary
✅ Easy login via the top-right corner.
✅ Create new pages with just a few clicks in the “Content” section.
✅ Drag & drop screenshots directly into pages for rich visual support.
✅ Full version history lets you review and restore any previous state.
✅ Intuitive UI for browsing, editing, and managing knowledge.
Enjoy exploring and building knowledge together!